© IE Online Media Services Pvt Ltd

 If Copilot isn't showing up, you can force enable it using a third-party tool. (Image Source: Microsoft)
Microsoft Copilot AI is already accessible to several Windows 11 users, with some still awaiting access to the AI-powered chatbot. Powered by the GPT-4 large language model, Copilot on Windows offers assistance in a diverse range of tasks. In fact, Copilot on Windows 11 can also summarize web pages in Edge, explain content on the screen, and will soon provide summaries and analyses of files on your PC. Copilot is presently available in 160 regions, including India. However, if Copilot isn’t accessible on your Windows 11 PC, here are some methods to enable the AI-powered chatbot, even if you currently lack access.
 Enabling the Copilot shortcut is pretty easy. (Express Photo)
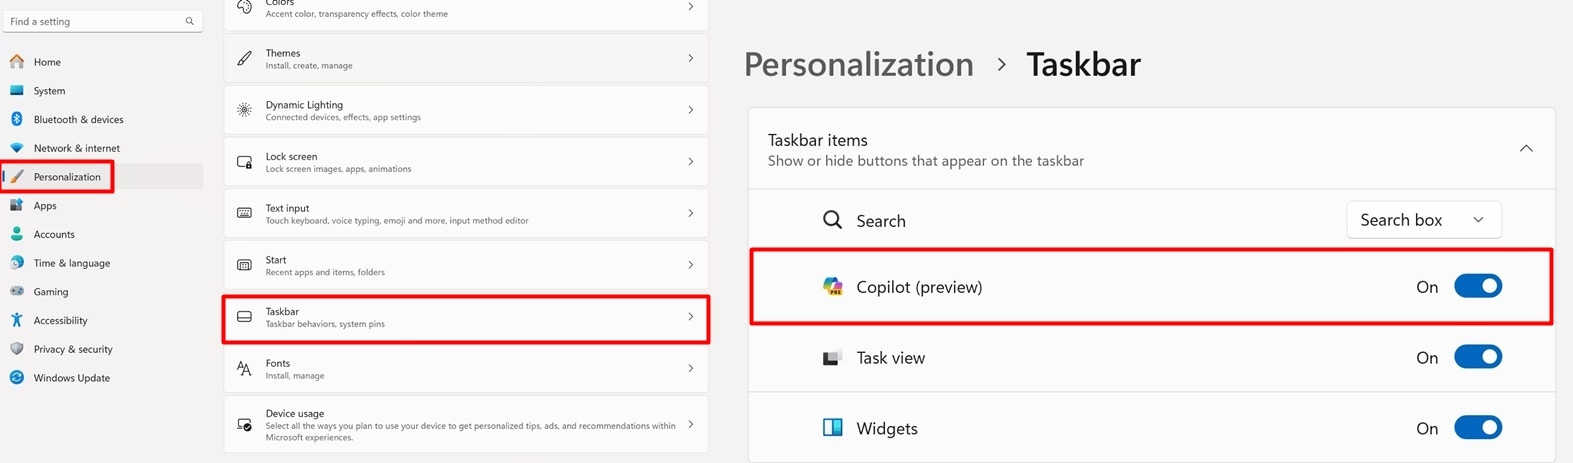
To get the Copilot button on your Windows 11 taskbar, open the ‘Settings’ app on your PC and from the left pane, click on ‘Personalisation’. Now, on the screen that appears on the left, click on ‘Taskbar’ and turn on the toggle named ‘Copilot (Preview)’.
This will pin Copilot to the bottom taskbar. You can also trigger the chatbot using the ‘Windows + C’ keyboard combination.
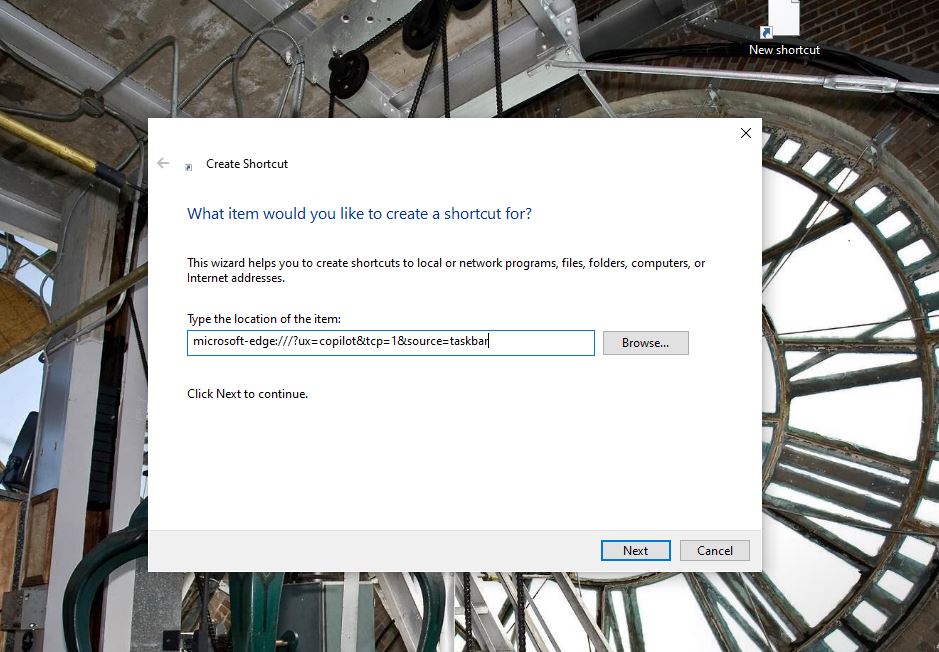
If you can use Copilot using the keyboard shortcut but the icon is not appearing on your taskbar for some reason, like when using multiple monitors, you will have to manually create a Copilot icon.
 Here’s how to create a desktop shortcut to Windows Copilot. (Express Photo)
1. To do so, right-click in an empty part of your desktop, click on ‘New’ and then choose ‘Shortcut’.
2. In the window that appears, copy and paste ‘microsoft-edge:///?ux=copilot&tcp=1&source=taskbar’.
3. Press ‘Next’ from the bottom right, name the shortcut ‘Copilot’ and click on the ‘Finish’ button.
In case Copilot still isn’t working on your Windows 11 PC, you can force enable the feature using a third-party tool called ViVeTool.
1. Download the ViVeTool zip from the website and extract the contents to a folder. We saved it to a folder named ‘ViVeTool’ on the desktop for reference.
2. Once done, open the folder in File Explorer, click on the address bar and copy the location.
3. Right-click on the ‘Start’ button and press on ‘Windows Powershell (Admin)’.
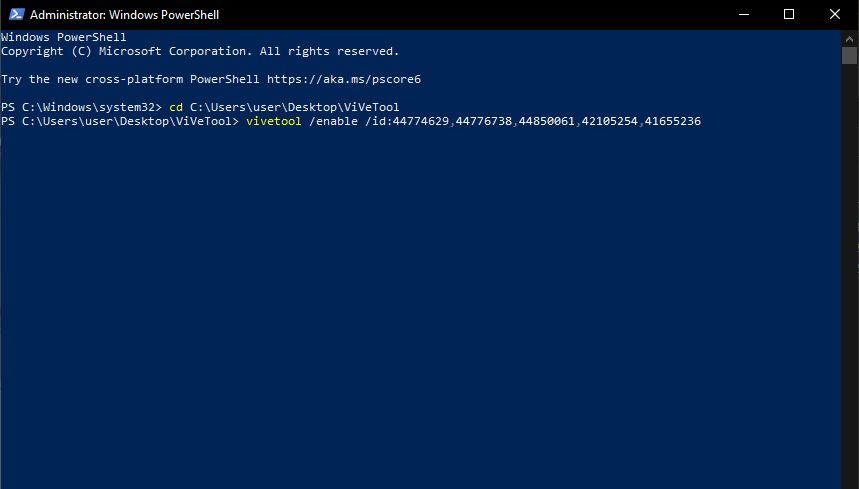 ViVeTool is a third-party tool that lets you force enable certain Windows features (Express Photo)
4. A new window will now appear, where you have to type ‘cd’, press the space bar and paste the location of the ViVeTool folder you copied earlier.
5. Now, copy the command ‘vivetool /enable /id:44774629,44776738,44850061,42105254,41655236’, press enter and restart your Windows 11 PC.
If you don’t like the new Copilot shortcut taking up valuable space on your Windows 11 PC, there’s a quick way to make it disappear. You can also completely disable the AI-powered chatbot. The GPT-4 powered AI assistant is also available on Windows 10, so if you finding a way to get it on the previous version of Windows, head over to this article.