


© IE Online Media Services Pvt Ltd
Tags:

If you recently bought a new PC, running on Windows 11 OS, you might have seen that the clock shows the time in 24-hours format by default. Given most of the wall clocks and wristwatches show time in 12-hour format, you might also want to change the 24-hour time format to 12-hour on a laptop/PC running on Windows 11 OS.
Here is an in-depth tutorial (with screenshots) on how you can quickly change the time format on your Windows 11 OS-powered computer from 24 hours to 12 hours with ease.
Go to settings and select Time and Language
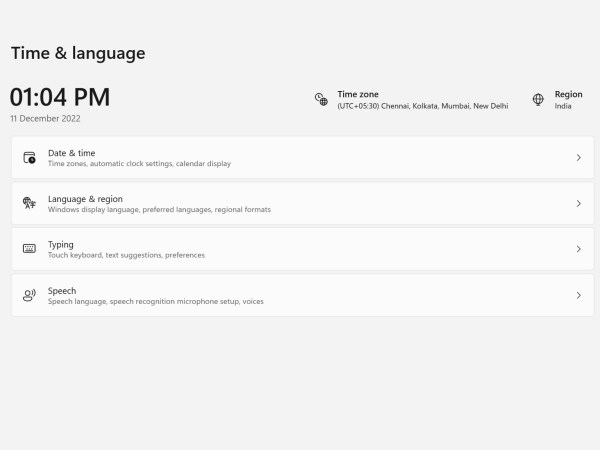
Select Time and Date

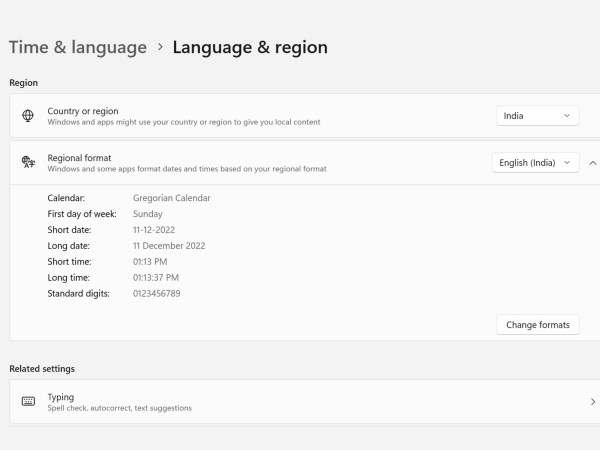
Select Language and Region

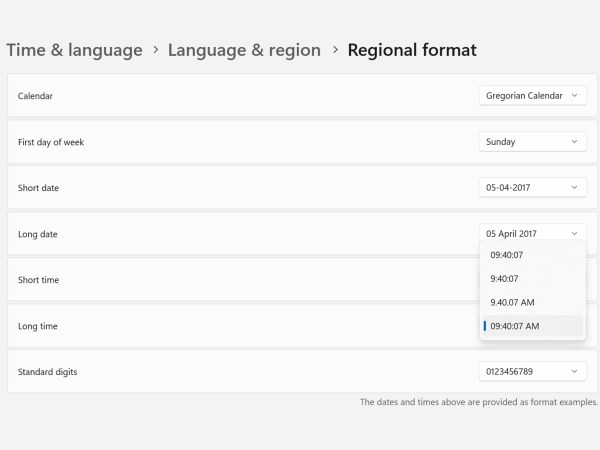
Select Regional format and click on change formats
Click on the Short time drop-down menu and select that says 09:40 AM

Click on the Long time drop-down menu and select that says 09:40:07AM
After making these changes, you can close the settings window and the time format on your Windows 11 computer will be changed from 24-hours format to 12-hour format. If you want to go back to the 24-hours format, go back to the same settings menu and select 09:40 on the short-time drop-down menu and 09:40:07 on the long-time drop-down menu.
In the same settings menu, you can also change things like time zone, and region, and can also add additional clocks, which is useful for someone who might travel to various locations with the different time zone. Overall, the time and language settings menu offers a lot of customisation options to Windows 11 users.


